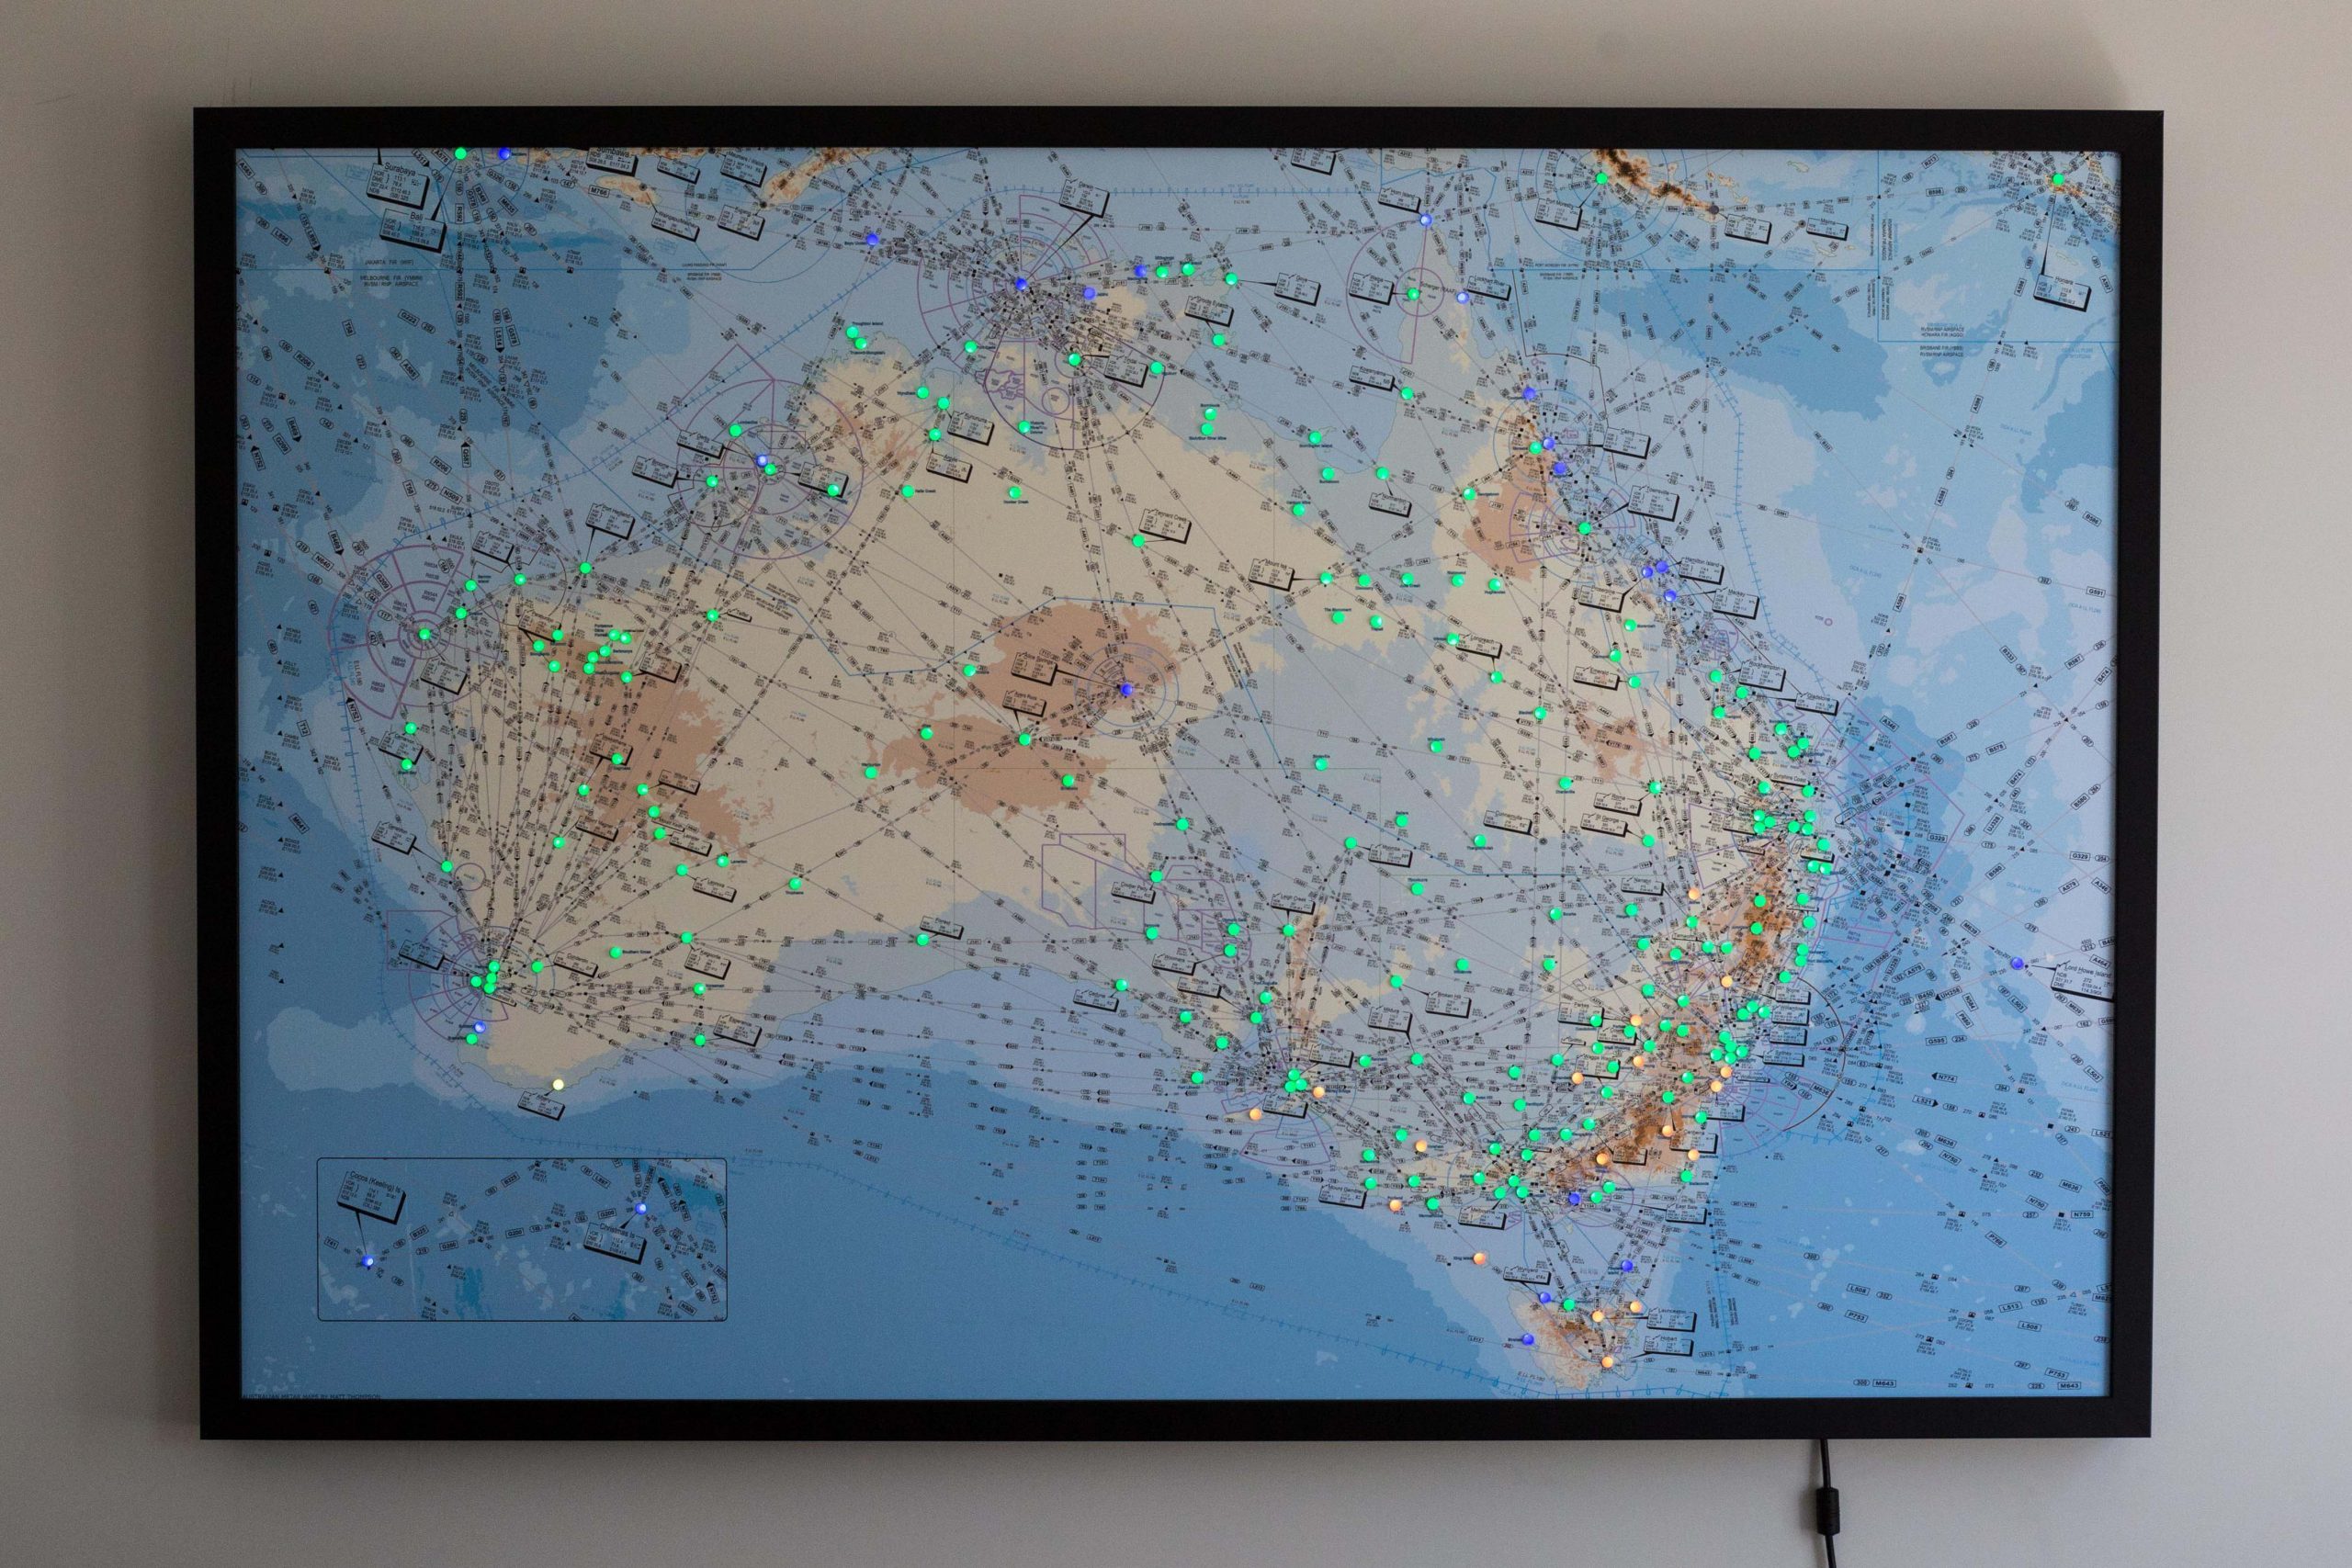
How to Make Your Own METAR Map
DIY Kits are available from my shop with a variety of different options which help simplify this project substantially.
Please check them out!

Building the map
Materials:
- Printed map
- Foamboard – 5mm thick with adhesive
- Logan Foamwerks Hole Drill Set
- WS2811 LED strings (Full size Australia map needs at least 5 LED strings of 50)
- Hot Glue gun (10 glue sticks)
- Stanley Knife
First you will need to print your map.
My fullsize maps of Australia are printed at B0 size
Attach printed map to Foamboard being careful to not have any bubbles.
The adhesive is very strong and will rip your map paper if you need to lift it off again.
Caution: I highly recommend getting a second pair of hands to help lay the map on the adhesive
Remove excess foamboard with a Stanley knife alone a straightedge or Foamwerks straight cutter and Channel Rail (Be careful of the rubber on the bottom of the ruler. It can leave black marks on the map).

Drill holes for each airport through the paper and foamboard with the smallest insert (7mm) for your foam drill.
Take your time with each airport so the drill doesn’t rip the paper.
Extra care should be taken with clusters of airports (Capital cities).
If the holes are too close together the LED’s can rip the map when you insert them.
Using a cutting mat or spare foamboard will help the drill stay sharp for cleaner holes.

To make configuring the map easier I recommend writing the airport code for each hole on the back.
It is harder to do with the LED’s in. I already know the order I use so I write that on the back instead of the airport codes.

When all holes are drilled it is time for the LED’s.
Check all the LED’s for extra glue on the tips.
It is easier to remove the extra glue now with a Stanley knife than later when they’re in the map after you turn it on and notice it. TRUST ME
Insert each LED through the foamboard from the back slowly.
The foam drill is 7mm wide and each LED is 8mm so the fit will be snug and if done quickly can tear the map a little bit. Twisting the LED while inserting it can help prevent this.
Use your hot glue gun to secure the LED’s in place
If the LED’s are too close together you can cut the jacket off the LED with a Stanley knife.
Plan where you want to start the first LED string keeping in mind where you will mount the Raspberry Pi. I always start with Tasmania.

Framing you map
Materials:
- Mitre Saw
- Wood glue – Titebond I or II or Gorilla Glue Woodglue from Bunnings
- Corner Brace Bracket 50mm
- Point driver and some points
- Corner Clamps – I use Irwin Quick Grips with the Corner Clamps add-on
- Self-adhesive Velcro dots
- Drill and drill bits
- Frame moulding – Needs at least 45mm rebate height. I use the Lucida style from Antons
- Hanging wire
- Framing D rings or Hanger Rail (Recommened!!!)
Start off by measuring your map and noting it down.
Make sure your mitre saw is properly set up with the fence and blade set true. This is important to make the glue up easier.
Cut your frame mouldings to size.
I have used a spare piece of Pine clamped to the outside of the moulding while cutting to help stop the frame chipping out and also so you can attach it to the opposite side piece when cutting for an exact match of length.
Otherwise, you can put some painters tape where the blade will cut through and this should help with blowout too.

The paint on the moulding is very fragile and will chip from very light knocks so be super careful while cutting so it doesn’t drop.
When cutting the frame pieces to size you need to account for the rebate in the measurements.
If you don’t the pieces will be slightly too long.
If you accidentally cut the pieces too short you can always trim the map down a bit.
Check each piece against the map to make sure it will fit well before gluing.
You want the map to be 1-2mm shorter than the inside edge to help with the fitting.

Arrange all the pieces in place and do another check of the fit for the map just in case and also check the 45° cuts fit well. I usually do a dry clamp up to check as well.
When you are confident it will fit well and there will be no big gaps when gluing it together it is time to start.

Apply a small amount of glue to the ends of the frame and make sure it covers all the area they will contact.
If you use too much glue it is fine. It is just more to clean up when it gets squeezed out.
If you’re unsure just use more glue. A damp cloth will clean up any excess glue later.

Join the corners together and lightly clamp, checking the fit.
Take your time with this step and try to get the front facing and outside corner lined up as well as you can. Inside doesn’t matter as much since you won’t be seeing it.
Repeat this for each corner.

Go around and check each join and then tighten the clamps a little bit more to secure them better.
Use your corner clamps to hold the frame together while the corners dry for at least 24 hours.
For extra strength you can now attach the corner braces.
These are fairly straight-forward. Just mark out the holes for the screws and drill a small pilot hole for each of them and then attach the braces.
Once dry you can fit your map (and glass/acrylic if you have it) and secure it with your point driver.
If you don’t have a point driver and don’t want to buy one you could probably use little nails to hold the map in. Points are way easier to do though. I’ve never used nails so I don’t know how well that would work.

Just point and shoot into the frame.

I try and space the points around 20cm apart and that works well and isn’t overkill.

If you plan on mounting the Raspberry Pi to the frame it is wise to put a layer of wood glue in the spot and letting it dry. Velcro dots peel off the wood after a while so the glue creates a better sticking surface for them.
To attach the hanging wire measure an equal distance from the top of the frame on both sides and mark it.
On my full size maps I measure 15cm from the top as the wire sags a lot over 1.5m.
Being high on the frame helps the frame sit closer to the wall at the top and hides the wiring at the back better.
Place the D rings with the ring pointing up below where you marked and mark out the screw holes so you can drill pilot holes.
Now attach the D rings with the provided screws. Frame wood is very soft so don’t over tighten them. Best to use a hand screwdriver for this.
Thread the wire through the first D ring and wrap it around itself as per the instructions on the wire packet then do the other side making sure the wire is tight. Once again, be careful not to damage the frame by over tightening.
Also, be mindful of the frayed ends of the wire. They hurt when you get stabbed by them.
UPDATE: I no longer use wire and D rings as the maps are too heavy when you put glass in them. I use these hanger rails and they’re much better.
Configuring Raspberry Pi
Materials:
- Raspberry Pi Zero W – I use the WH model
- 74AHCT125 Quad level shifter
- DC barrel jack
- Power Supply
- 16GB Micro SD Card
- Pigtail connector
- Solder
- Soldering Iron
- Keyboard and mouse – I recommend a wireless combo like this
- MicroUSB to USB Adaptor
- HDMI cable and MiniHDMI adapter if you get the RPi Zero like I use
If you bought the Raspberry Pi with my DIY kit this will already be done for you and you can skip to the ‘Configure LED order and other settings’ section
To power the LED’s and the Raspberry Pi with only one power supply you will want to connect the LED circuit to the GPIO ports on the RPi.
This is already done with a custom HAT for the Raspberry Pi’s that comes with my DIY kit RPi.
I followed this guide when I was learning
Your wiring/circuit should be as follows:
- Pi GPIO18 (Pin 12 or the 6th down on the right) to 74AHCT125 pin 1A (2nd pin from the left on the bottom row)
- 74AHCT125 pin 1Y (3rd pin from the left on the bottom row) to LED DIN (Middle wire – Usually green wire)
- Power supply ground to 74AHCT125 ground (Bottom left-most pin)
- Power supply ground to 74AHCT125 pin 1OE (Bottom right-most pin)
- Power supply ground to Pi GND (7th pin down on the right or pin 14)
- Power supply ground to Pi GND (3rd pin down on the right or pin 6)
- Power supply ground to LED GND (Usually white wire)
- Power supply 5V to 74AHCT125 VCC (Top left-most pin)
- Power supply 5V to LED 5V (Usually red wire)
- Power supply 5V to Pi 5V (Pin 2 or the top right pin)
![]()

On a DC barrel jack connector, the 5V will be the rear most pin and the Ground will be the pin in the middle.
I always refer to the 74AHCT125 chip with notch out of the top surface pointing to the left like in the above diagram.
Once you have your circuit sorted out you can start configuring the software.
With a fresh Raspberry Pi you will need to get Raspian on your MicroSD card which you can follow this guide.
When you have NOOBS on the SD card put it in the RPi and connect it up to your TV/Monitor and power it on.

Select Raspbian Full

Go to Wifi Networks and connect to your Wifi

Click install and then ‘YES’

It will install in around 20 minutes and then show this screen

Click ‘OK’ and it will restart

You will see a Welcome Screen to help configure Raspian

Follow through these steps configuring it to your needs.


It should automatically install any updates and when done ask you to restart


When it has booted up again go to the Raspberry icon in the top left and then
‘Preferences’ then ‘Raspberry Pi Configuration’

Change Boot to ‘To CLI’

Click the ‘Interfaces’ tab and enable ‘SSH’ and ‘I2C’ and then click ‘OK’

Now open the Terminal and type ‘ifconfig’ and press enter to show you what your IP address is


Note the IP address down for later.
Your RPi is now set up so you can connect to it via SSH over Wifi and you will no longer need it to be connected to a screen.
Download and install Putty on your PC so you can SSH into the RPi.

Open Putty and type the IP address that you noted down earlier into the field and press enter

Click Yes on this

Log in with the username and password you set up – Default username and password is pi and raspberry
We need to disable the RPi soundcard so it can use the GPIO18 port

Type
cd /etc/modprobe.d
and press enter

Type
sudo nano snd-blacklist.conf
and press enter

Type
blacklist snd_bcm2835
and then press CTRL+O then enter then CTRL+X

Reboot with
sudo reboot
Reconnect like before with Putty

Type
aplay -l
and then enter and this should show that there are no soundcards which is what we want.

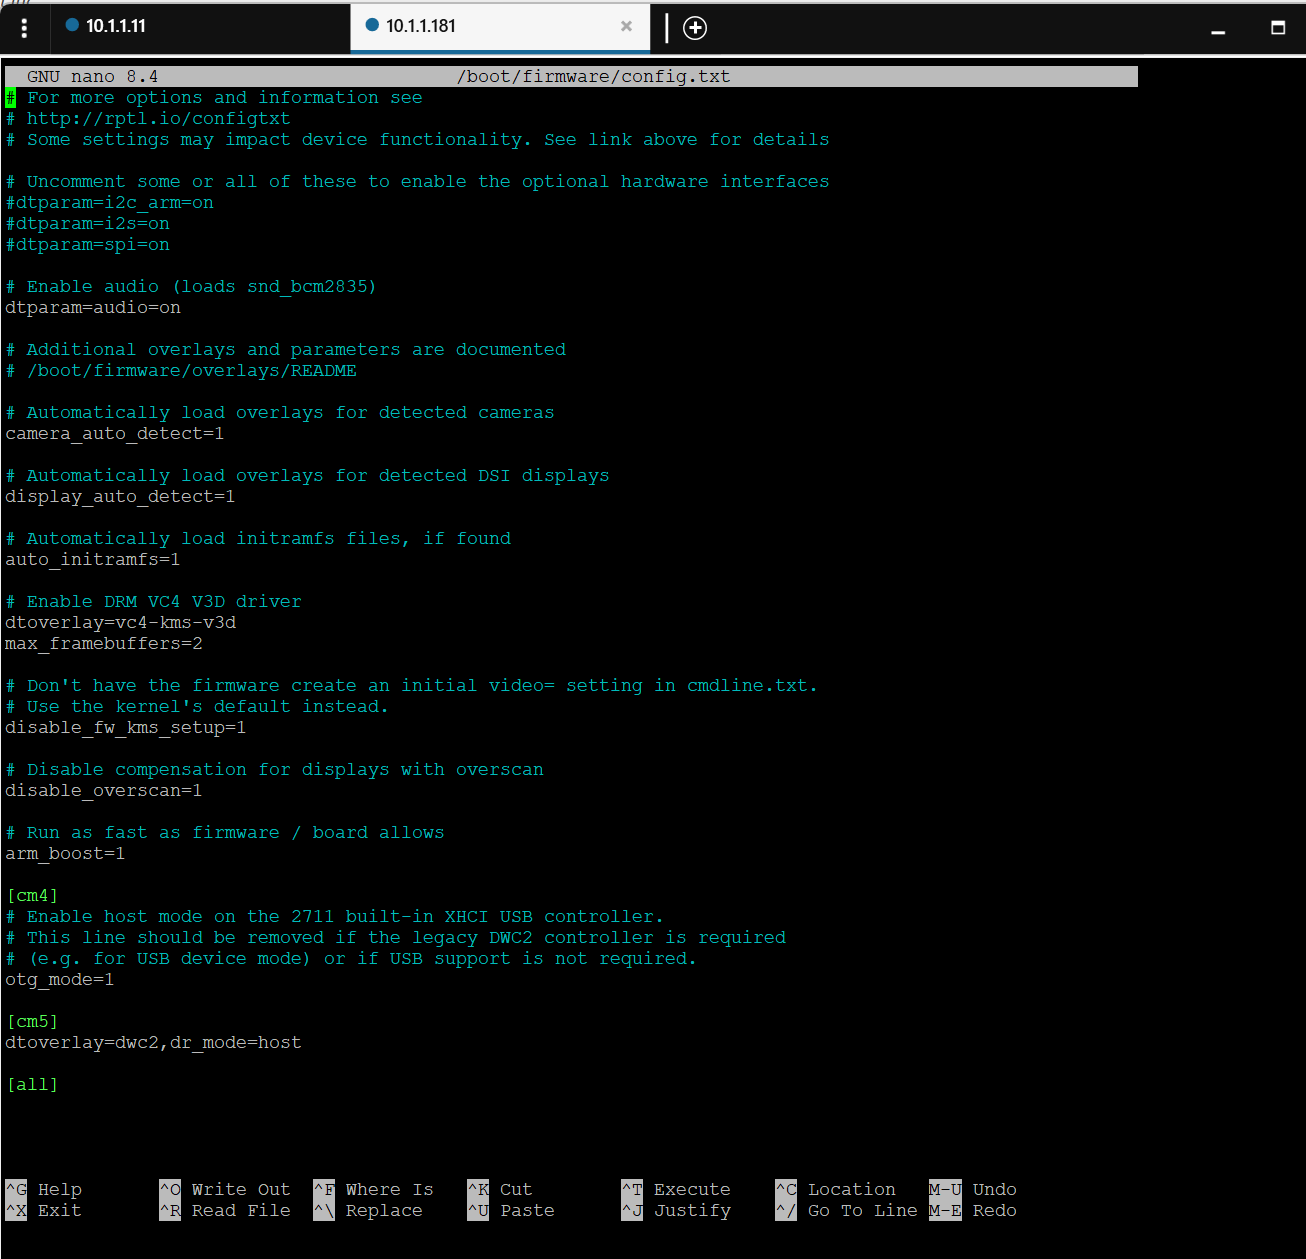
With the newer versions of Raspberry Pis you may need to disable the vc4hdmi HDMI audio instead. To do this you will want to go to /boot/config.txt and put a # in front of the “dtparam=audio=on” line and also change “dtoverlay=vc4-kms-v3d” to “dtoverlay=vc4-kms-v3d,noaudio” and save and reboot

Now to install rpi_metar_au and run it automatically like these instructions but with a twist for Australian styling.
WARNING: The screenshots below will have ‘rpi_metar’ in a lot of places instead of ‘rpi_metar_au’. Make sure you follow what I’ve typed out and not the screenshots.

Copy this into the session
sudo su
apt install python3-venv -y
python3 -m venv /opt/rpi_metar_au
source /opt/rpi_metar_au/bin/activate
pip install -U git+https://github.com/thommo17/rpi_metar_au.git@Main

You may see errors like this. If this happens just run the install again with
pip install -U git+https://github.com/thommo17/rpi_metar_au.git@Main
When done you can exit and reboot with
exit
sudo reboot

Reconnect again and type
sudo nano /etc/systemd/system/rpi_metar_au.service
and enter

Copy this into the file
[Unit]
Description=METAR Display
Wants=network-online.target
After=network.target network-online.target
[Service]
ExecStart=/opt/rpi_metar_au/bin/rpi_metar
User=root
Group=root
Restart=always
[Install]
WantedBy=multi-user.target
Save with CTRL+O and enter then exit with CTRL+X

Make systemd aware of the changes by typing
systemctl daemon-reload

If it asks for authentication choose option 1 (pi/your username) and then enter your password

Make sure it’s set to run at boot by typing
systemctl enable rpi_metar_au

Start the service with
systemctl start rpi_metar_au

Check the service is running with
systemctl status rpi_metar_au
You should see it say active (running) in green
Configure LED order and other settings
If you just skipped to this section because you bought my DIY kit please download and install Putty and also find out what your Raspberry Pi’s IP address is.
There is a chance that if you tried to follow my LED ordering that you can skip this section too as it will all be correct already.
To find out your Raspberry Pi’s IP address you may need to log into your Wifi router and look for it in there. Probably under DHCP or lan leases etc.
Type
sudo nano /etc/rpi_metar.conf
and enter
The conf file should have airports at the top in this format and should start at 0
[airports]
YMML = 0
YSSY = 1
Then settings in this format
[settings]
brightness = 50
lightning = True
lightning_duration = 1.68
metar_refresh_rate = 300
do_fade = False
unknown_off = True
max_wind = 25
wind_duration = 1.68
wind = True
papertrail = False
sources = BOM,NOAA
Legend should come after setting like this
[legend]
VFR = 120
MVFR = 115
IFR = 116
LIFR = 117
Wind = 118
Light = 119
Save the file with CTRL+O and then exit with CTRL+X
Restart the program to get the new config changes with
systemctl restart rpi_metar_au
My full config file can be found at the bottom of the page.
Now that the RPi is configured you can plug it into your LED’s and mount it behind your map and turn it on.
It shouldn’t take more than 5 minutes to boot up and start showing all yellow LED’s first then as the METAR’s are downloaded and parsed each of them will change to their corresponding colours.
Check each of the LED’s to see if they are on and the correct colour and adjust the order in the config file if you need to.
When that is all correct your map is ready to be hung up and enjoyed!
If you have any feedback for me about this tutorial, or anything else, I am keen to hear it as I am always looking to improve the map and help anyone building one themselves.
Please contact me here
This is my full config file for reference
[airports]
YPCC = 6
YPXM = 9
YABA = 11
YBLN = 12
YBUN = 13
YPJT = 14
YRTI = 15
YPPH = 16
YPEA = 17
YCUN = 18
YSCR = 19
YNSM = 20
YESP = 21
YPKG = 22
YLTN = 23
YTRA = 24
YLEO = 25
YLST = 26
YMNE = 27
YWLU = 28
YDGU = 29
YMEK = 30
YMOG = 31
YGEL = 32
YSHK = 33
YCAR = 34
YPLM = 35
YOLW = 36
YBWX = 37
YPKA = 38
YBGD = 39
YPBO = 40
YSOL = 41
YPPD = 42
YFDF = 43
YBRY = 44
YCWA = 45
YANG = 46
YCHK = 47
YNWN = 48
YTEF = 49
YWBR = 50
YFRT = 52
YGLS = 54
YKNT = 55
YAYE = 56
YERN = 57
YBAS = 58
YOOD = 60
YCBP = 61
YTAR = 62
YCDU = 63
YWUD = 64
YPWR = 65
YOLD = 66
YLEC = 67
YOOM = 68
YBDV = 69
YLLE = 70
YWDH = 71
YLRE = 72
YBCK = 73
YBCV = 74
YTGM = 75
YTIB = 76
YBHI = 77
YREN = 78
YPAD = 79
YPPF = 80
YPED = 81
YPAG = 82
YWHA = 83
YCEE = 84
YPLC = 85
YKSC = 86
YMBD = 87
YNRC = 88
YMTG = 89
YNHL = 90
YMIA = 91
YSWH = 92
YHSM = 93
YHML = 94
YPOD = 95
YWBL = 96
YKII = 97
YSMI = 98
YSRN = 99
YMHB = 100
YMLT = 101
YWYY = 102
YDPO = 103
YSTH = 104
YFLI = 105
YBNS = 106
YMES = 107
YLTV = 108
YMMB = 109
YMML = 110
YMAV = 111
YBLT = 112
YBDG = 113
YMNG = 114
YSHT = 115
YDLQ = 116
YHAY = 117
YIVO = 118
YWCA = 119
YCBA = 120
YBKE = 121
YWLG = 122
YCNM = 123
YCBB = 124
YSDU = 125
YCDO = 126
YGTH = 127
YNAR = 128
YWGT = 129
YHOT = 130
YMAY = 131
YSWG = 132
YTEM = 133
YWWL = 134
YFBS = 135
YPKS = 136
YYNG = 137
YCWR = 138
YORG = 139
YBTH = 140
YMDG = 141
YSCO = 142
YGDH = 143
YSTW = 144
YNBR = 145
YMOR = 146
YIVL = 147
YARM = 148
YCFS = 149
YLHI = 150
YKMP = 152
YPMQ = 153
YWLM = 154
YSSY = 155
YSHW = 156
YSHL = 157
YSNW = 158
YMRY = 159
YMER = 160
YMCO = 161
YCOM = 162
YSCB = 163
YGLB = 164
YSCN = 165
YSBK = 166
YSRI = 167
YCNK = 168
YMND = 169
YTRE = 170
YGLI = 171
YGFN = 172
YLIS = 173
YBNA = 174
YBCG = 175
YBAF = 176
YBBN = 177
YAMB = 178
YTWB = 179
YBWW = 180
YBOK = 181
YSGE = 182
YROM = 183
YCCA = 184
YKRY = 185
YBSU = 186
YHBA = 187
YMYB = 188
YGAY = 189
YBUD = 190
YGLA = 191
YTNG = 192
YBRK = 193
YEML = 194
YCMT = 195
YMRB = 196
YBMK = 197
YBHM = 198
YBPN = 199
YBTL = 200
YIFL = 201
YCKN = 202
YBCS = 203
YMBA = 204
YGTN = 205
YHUG = 206
YRMD = 207
YWTN = 208
YTEE = 209
YJLC = 210
YCCY = 211
YTMO = 212
YBMA = 213
YCNY = 214
YTNK = 216
YHOO = 218
YHLC = 219
YFTZ = 220
YCIN = 221
YDBY = 222
YBRM = 223
YLBD = 224
WADD = 228
WADL = 229
YBYU = 233
YTTI = 234
YTST = 235
YWYM = 236
YPKU = 237
YARG = 238
YVRD = 239
YPKT = 240
YPDN = 241
YPTN = 242
YJAB = 243
YMGD = 244
YMGB = 245
YELD = 246
YPGV = 247
YGTE = 248
YNGU = 249
YMHU = 250
YBRL = 251
YMTI = 252
YBKT = 253
YNTN = 254
YKOW = 255
YCOE = 256
YLHR = 257
YBWP = 258
YHID = 259
AYPY = 261
AGGH = 266
[settings]
brightness = 50
lightning = True
lightning_duration = 1.68
metar_refresh_rate = 300
do_fade = False
unknown_off = True
max_wind = 25
wind_duration = 1.68
wind = True
papertrail = False
sources = Avplan, AMM, NOAA